
How to add a widget
Starting with release 2.2, the Local Haze app supports adding widgets to your iPhone Home Screen or Today screen to get air quality at-a-glance. This feature is available to subscribers.
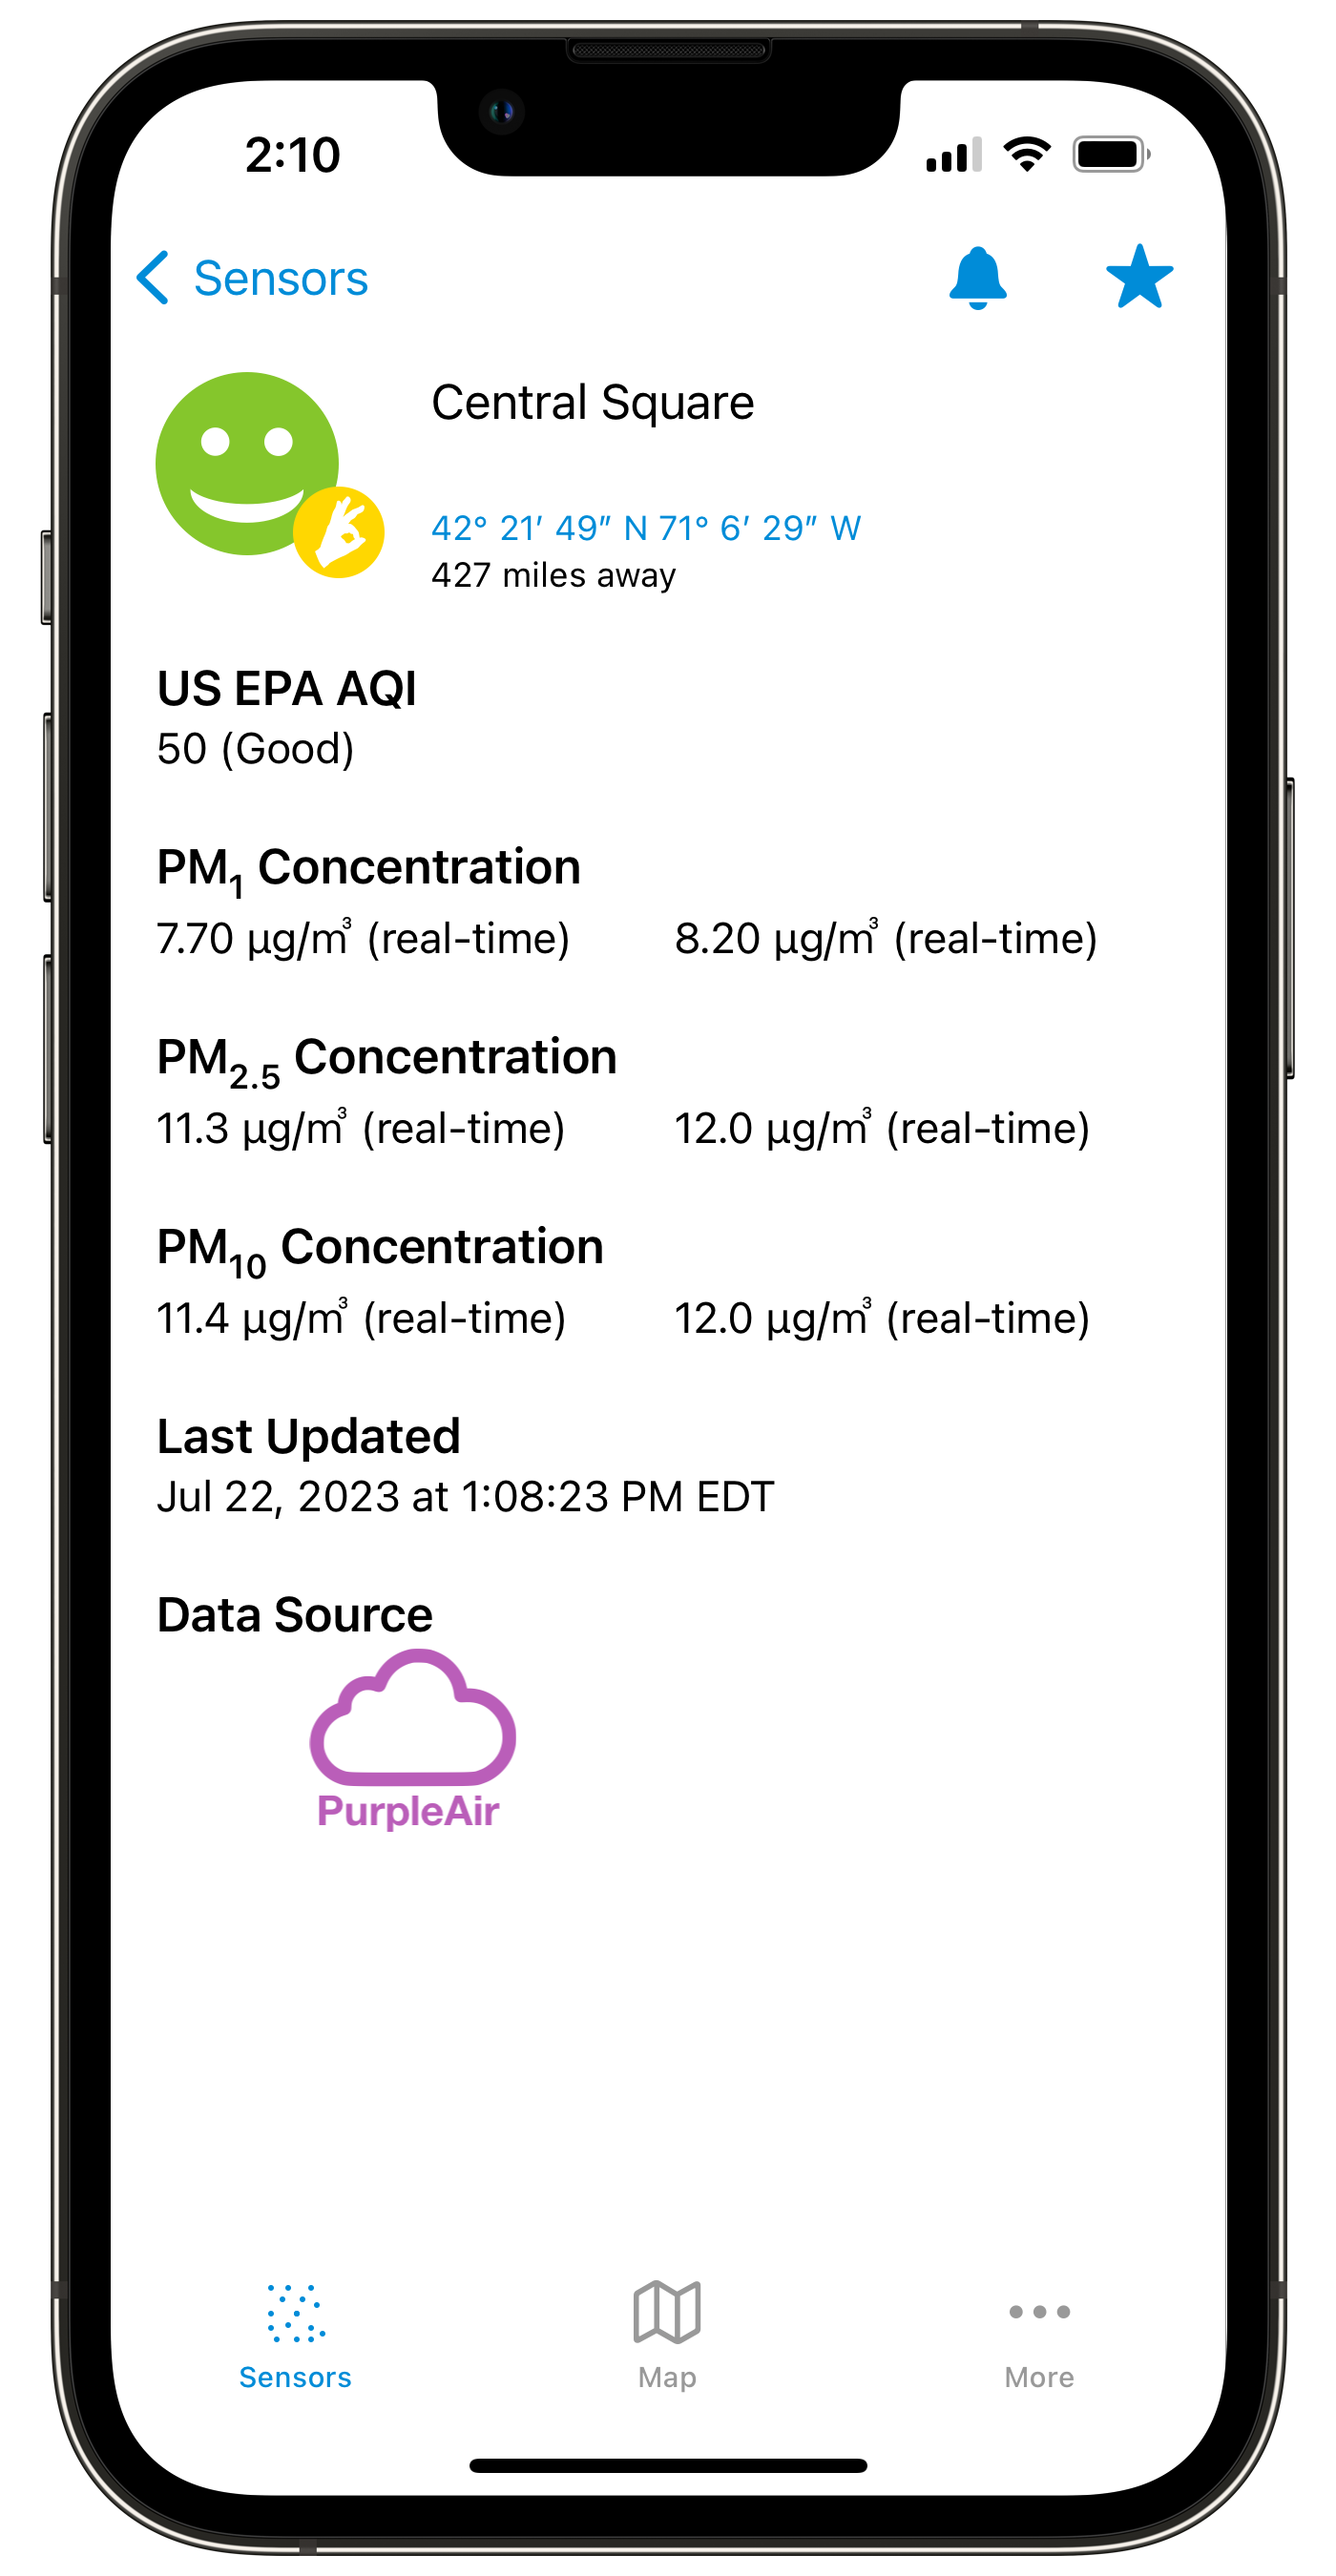
- Launch the Local Haze app. Search for an air quality sensor you are interested in and view the sensor details screen as shown below. Favorite the sensor by tapping the star icon at the upper right.

- Next, enable a notification to be alerted to significant air quality changes for this favorited sensor. To do this, tap the bell icon to set a notification.
- You will be prompted to subscribe if you do not have an active subscription to Local Haze. If you have an active subscription, proceed to step 4.
- Choose the best subscription option for you.
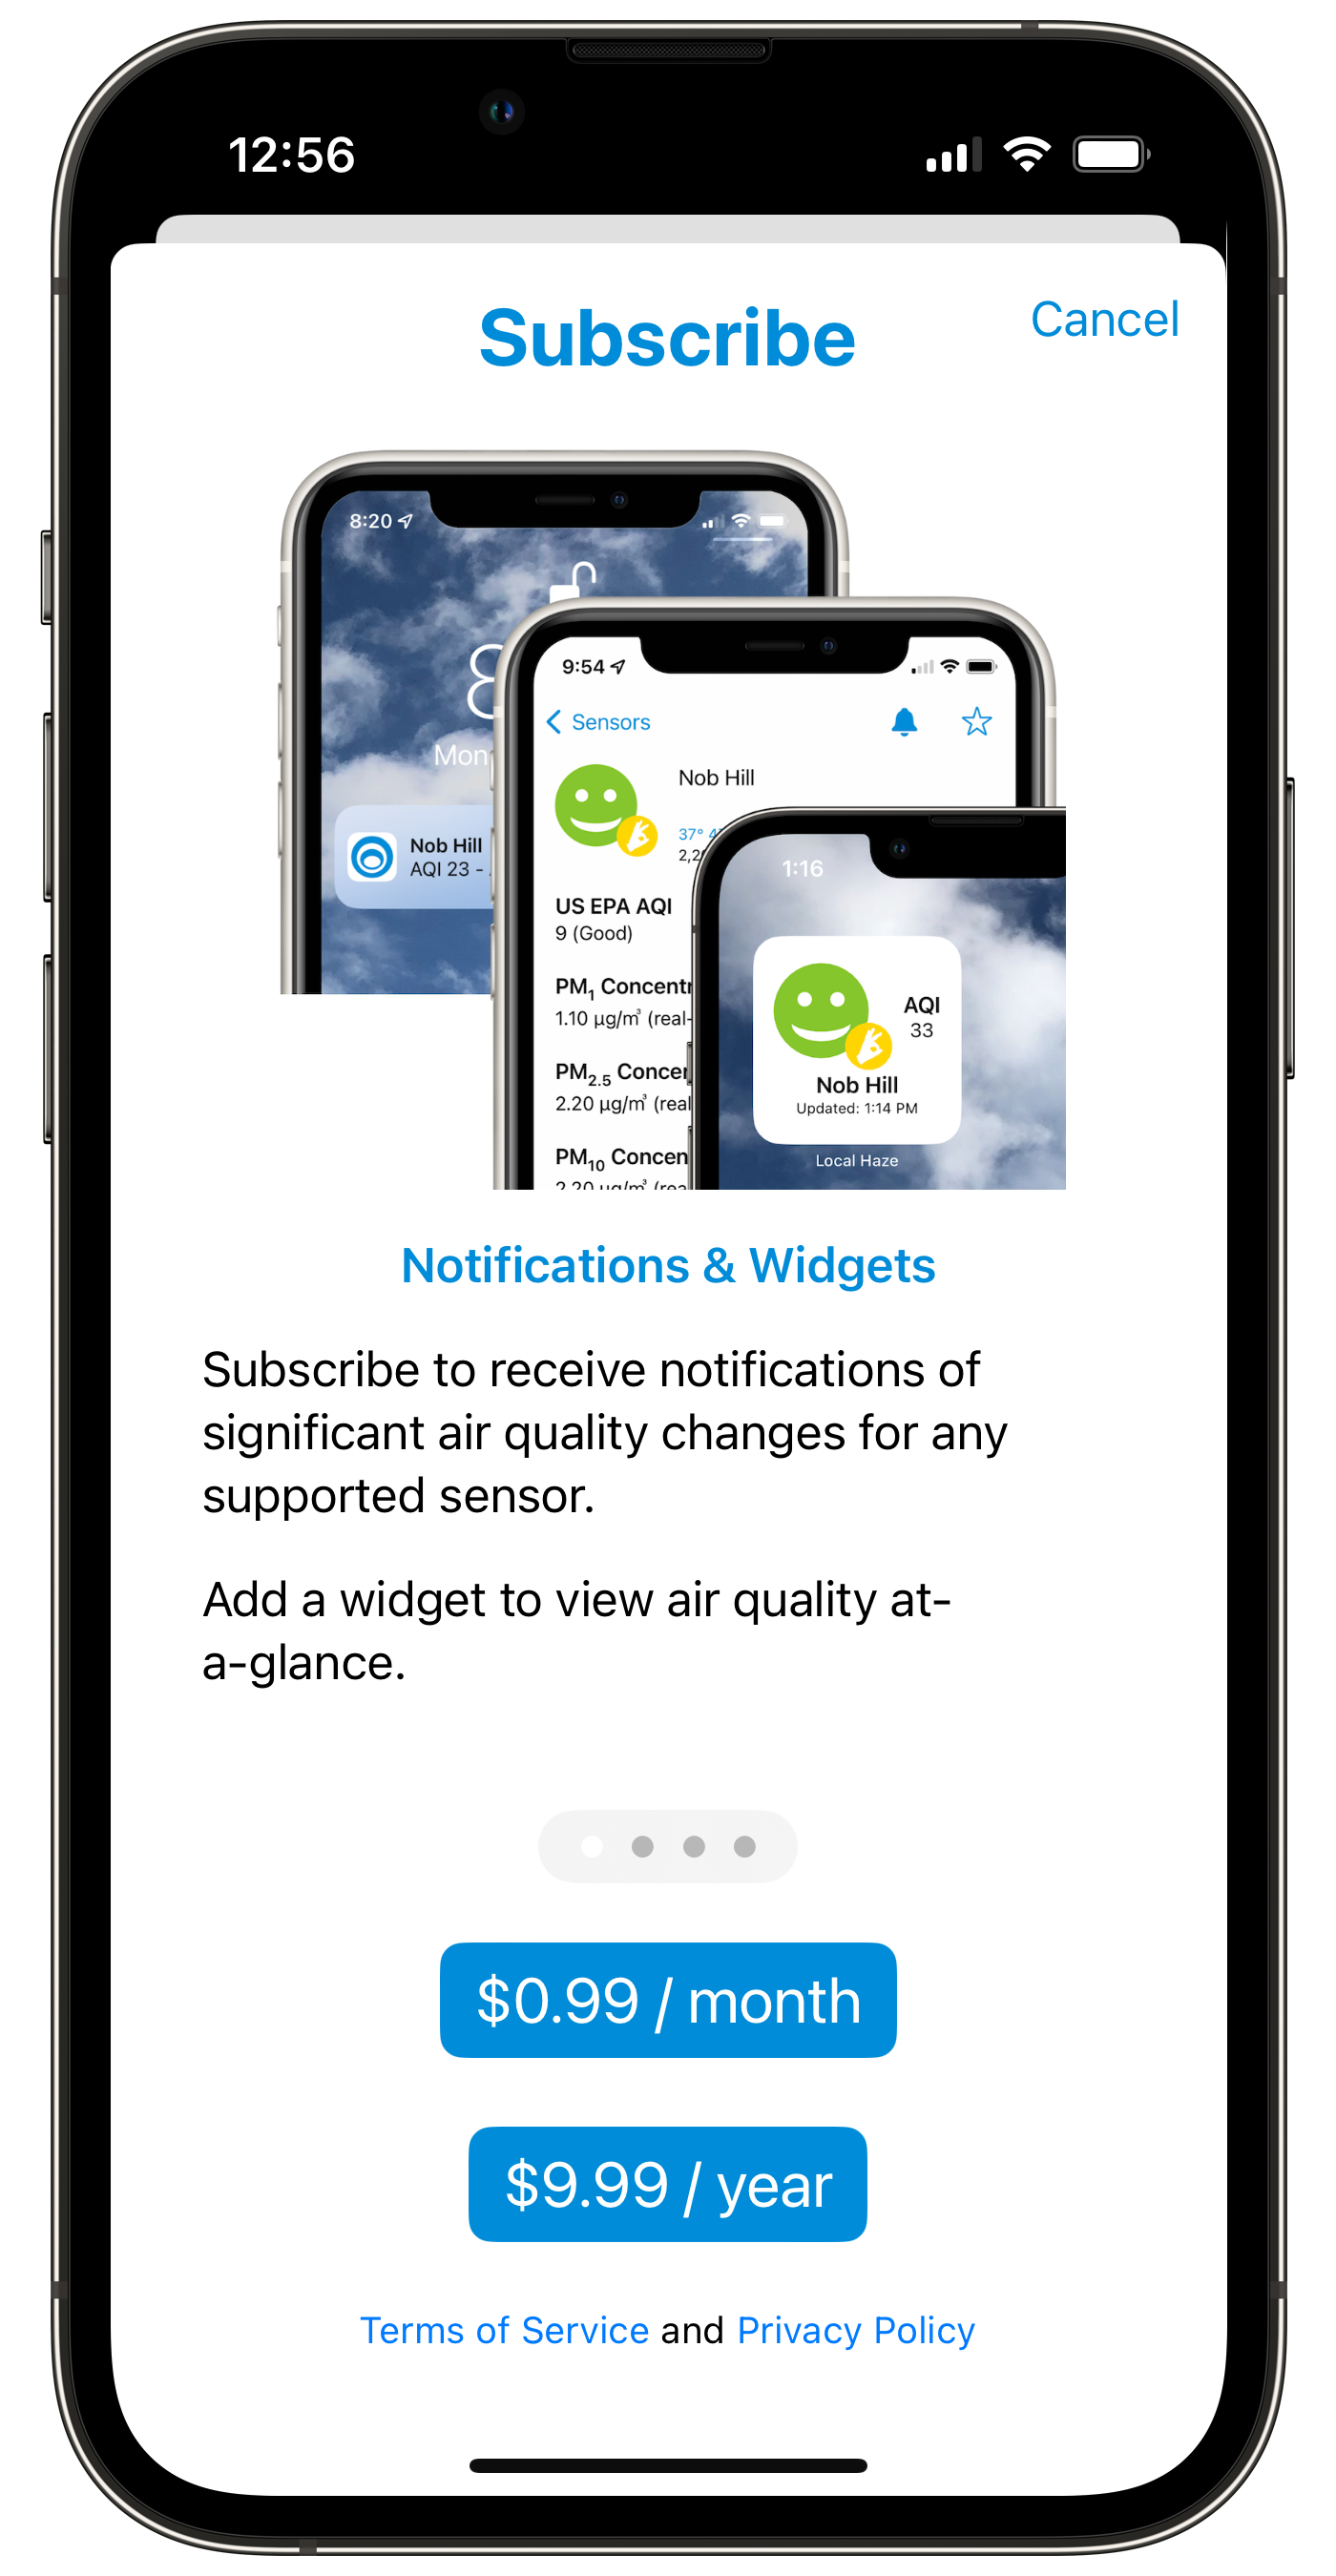
- On the next screen, tap the blue Subscribe button at the bottom of the screen.
- Enter your AppleID and password, then tap the blue Sign in button at the bottom of the screen.
- Wait for the confirmation notification popup titled “You’re all set”, and then tap OK.

- Choose the best subscription option for you.
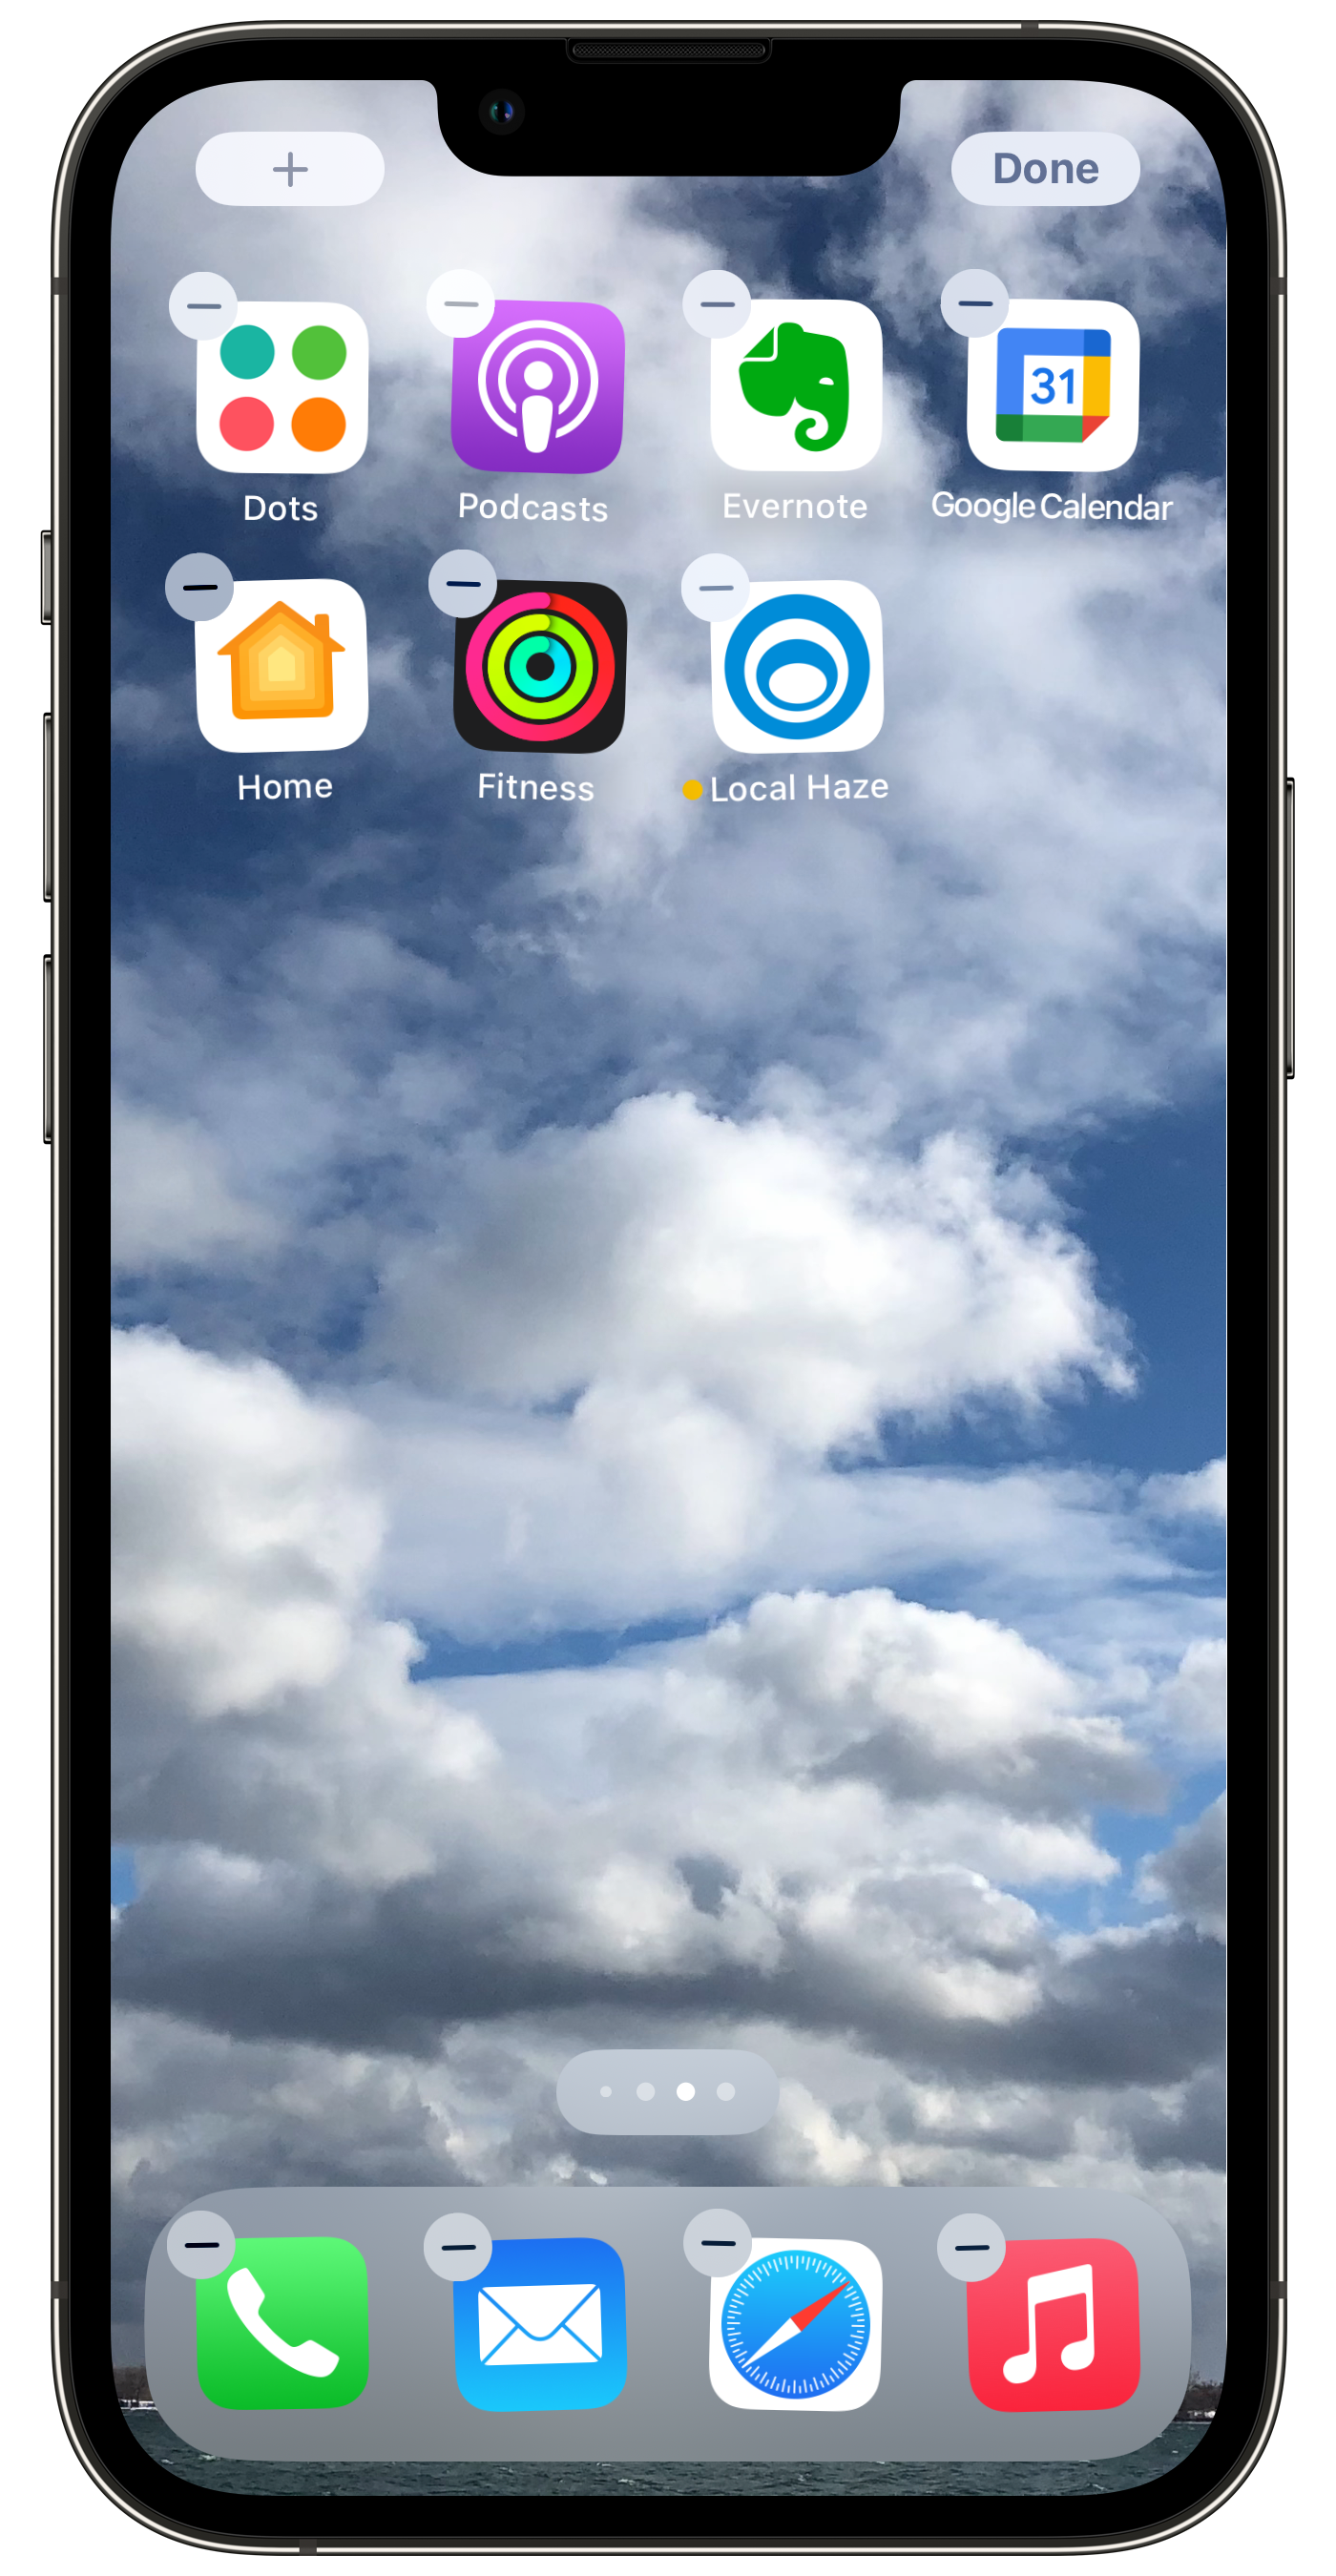
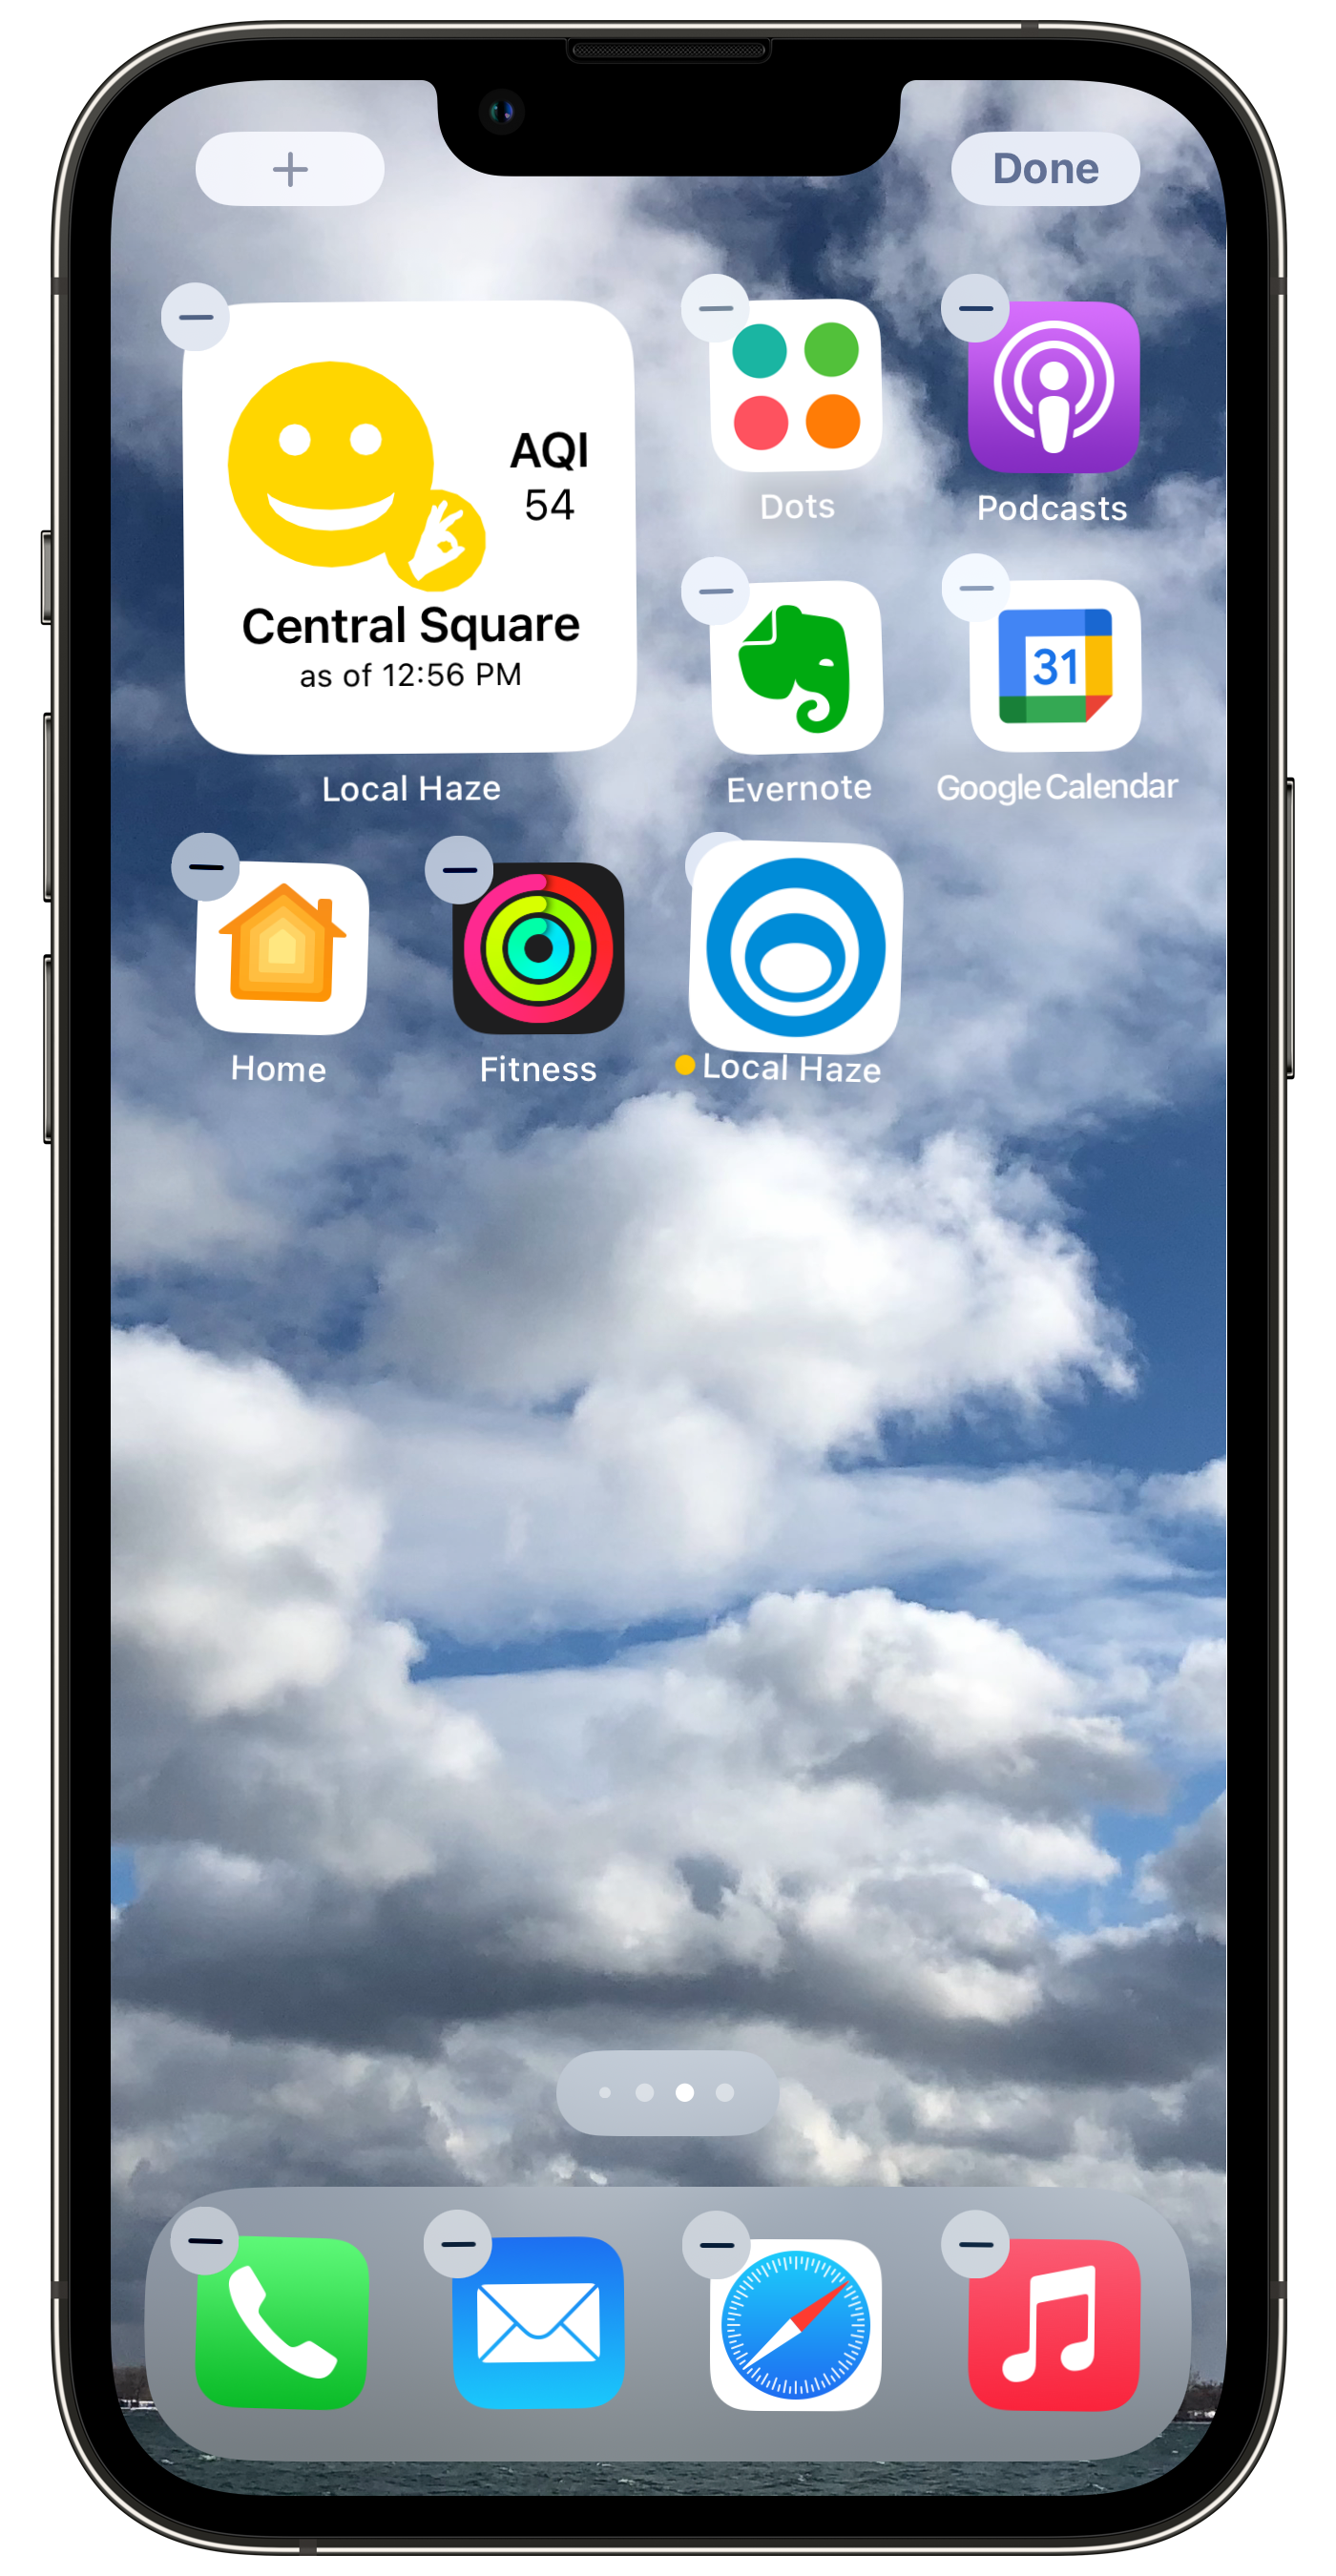
- Exit the Local Haze app by swiping up on the screen. To add a widget, on a blank area of the screen use the press and hold gesture. The icons will appear to be wiggling, each displaying a “-” button. Tap the “+” button at the upper left of the screen.
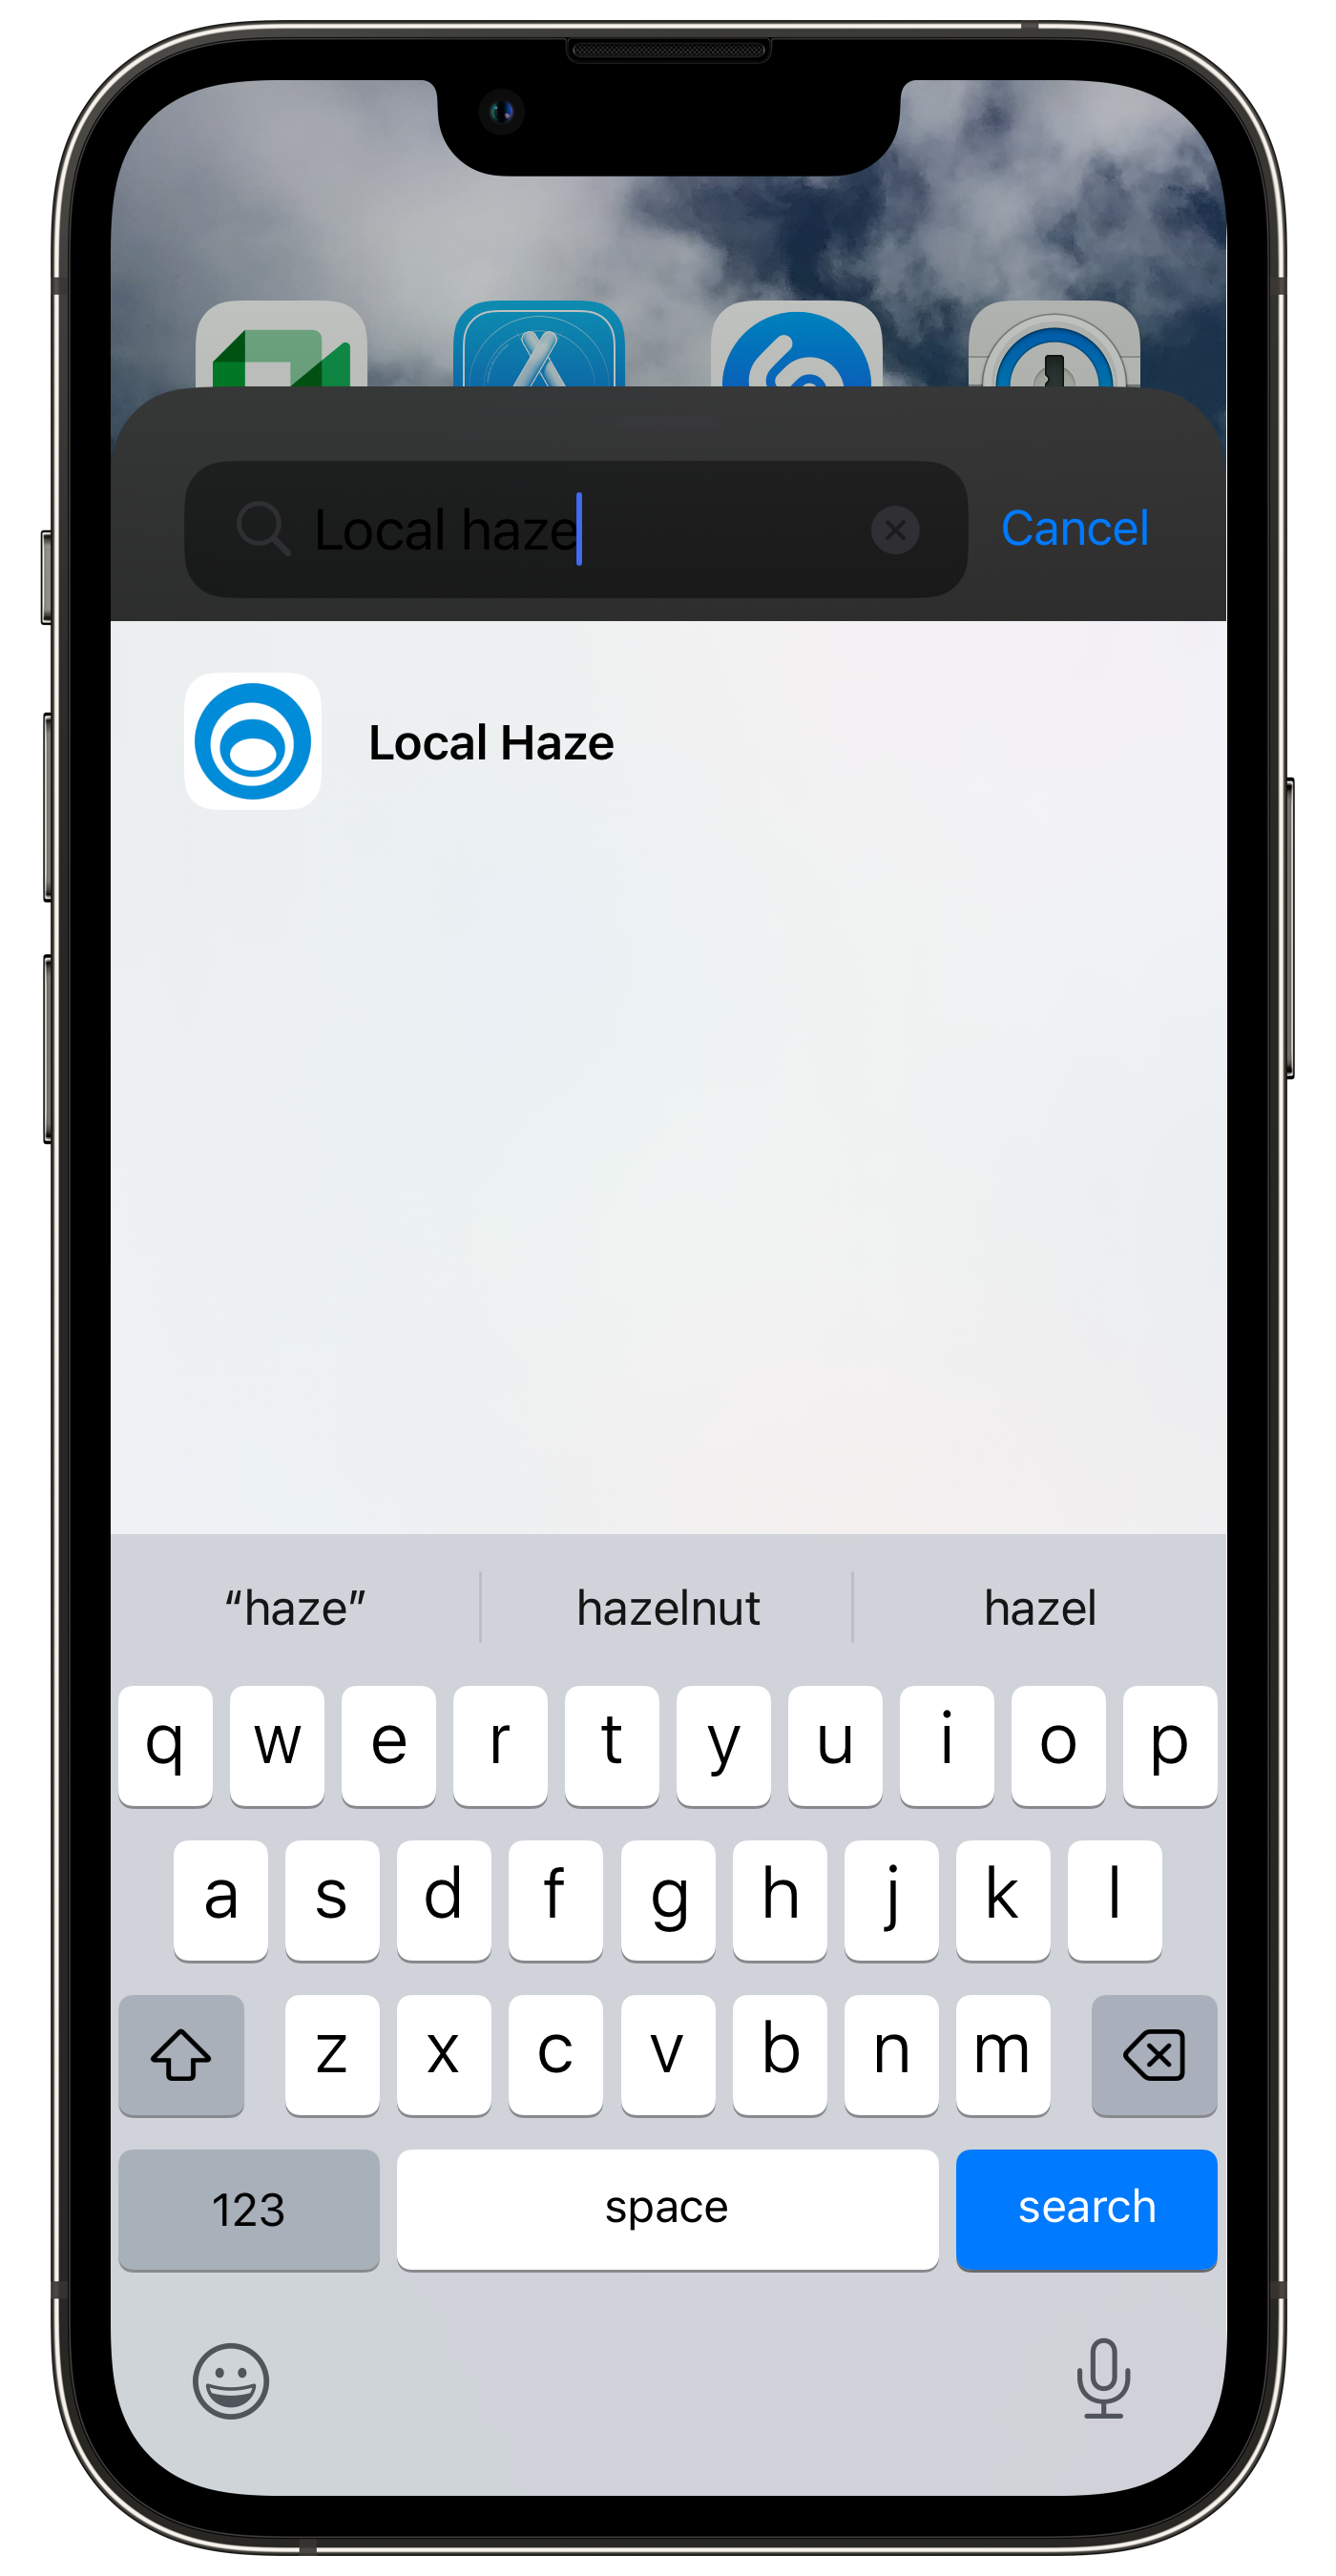
- In the search bar, search for Local Haze. You will see the Local Haze app listed in the results list. Tap on the Local Haze list item (Note that there is an Apple bug in the screen below, the dark area is where the text string has been entered).
- After selecting “Local Haze”, tap the blue “Add Widget” button at the bottom of the screen.
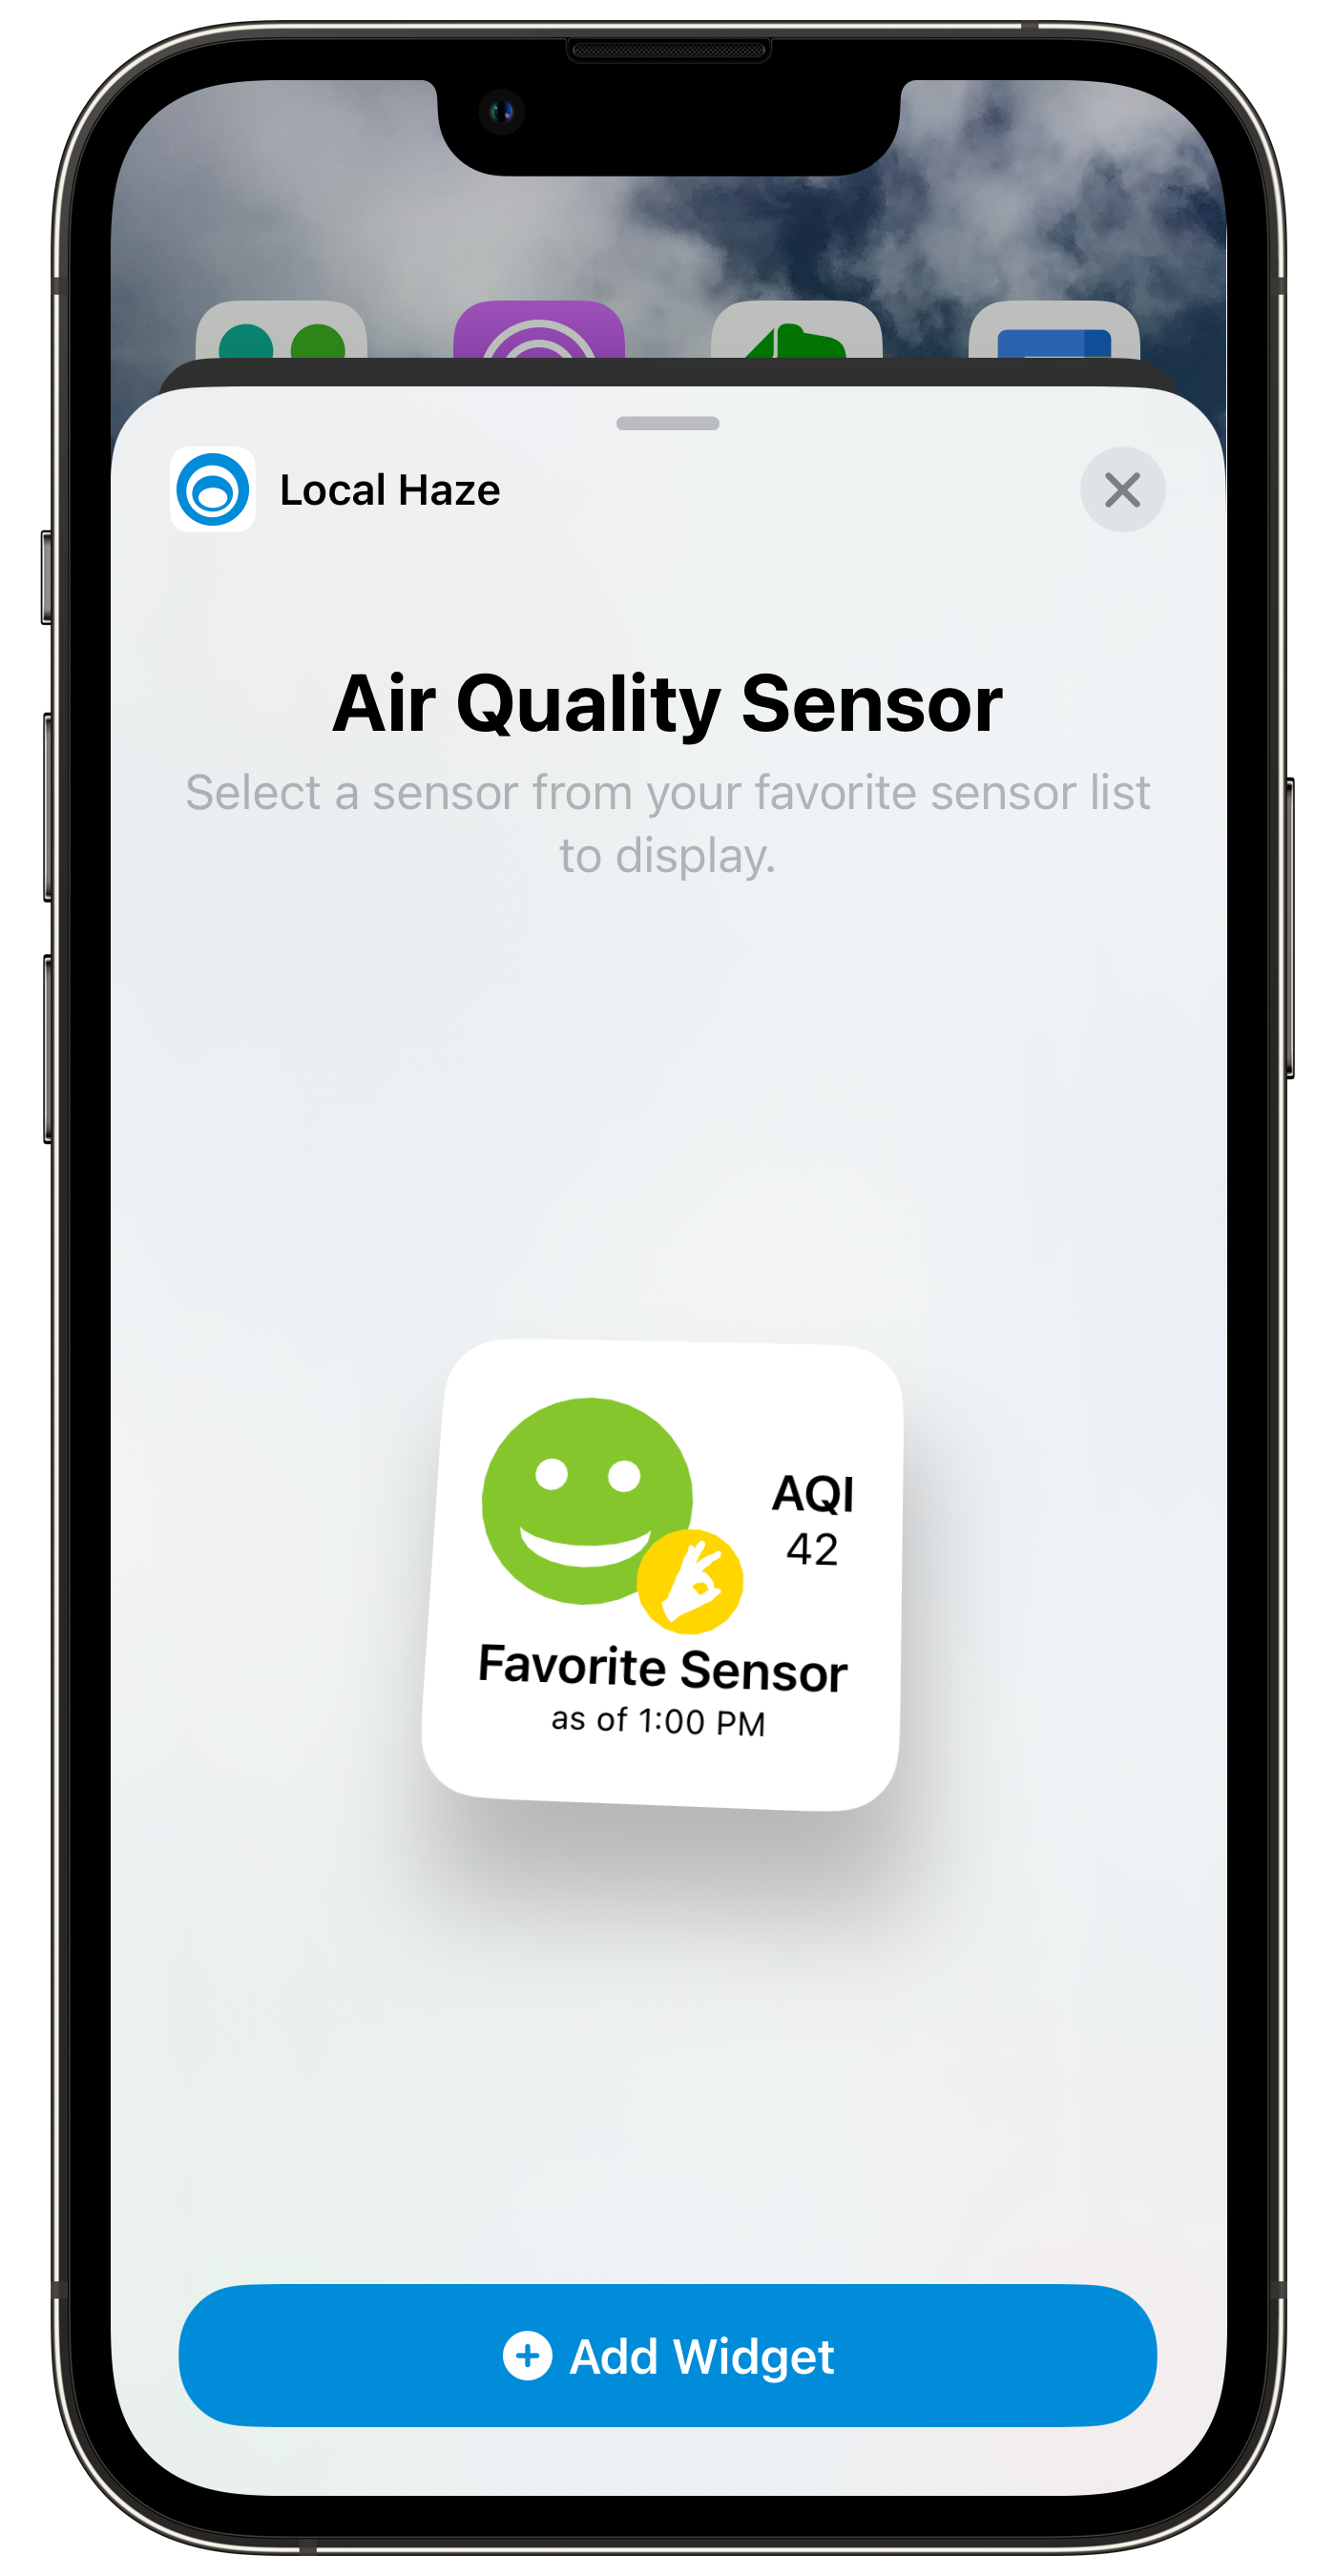
- You will see a confirmation screen and the added Local Haze widget will appear on the Home screen in a wiggling state, displaying the AQI data for the favorited sensor. To finish adding the widget tap the Done button at the upper right of the screen.
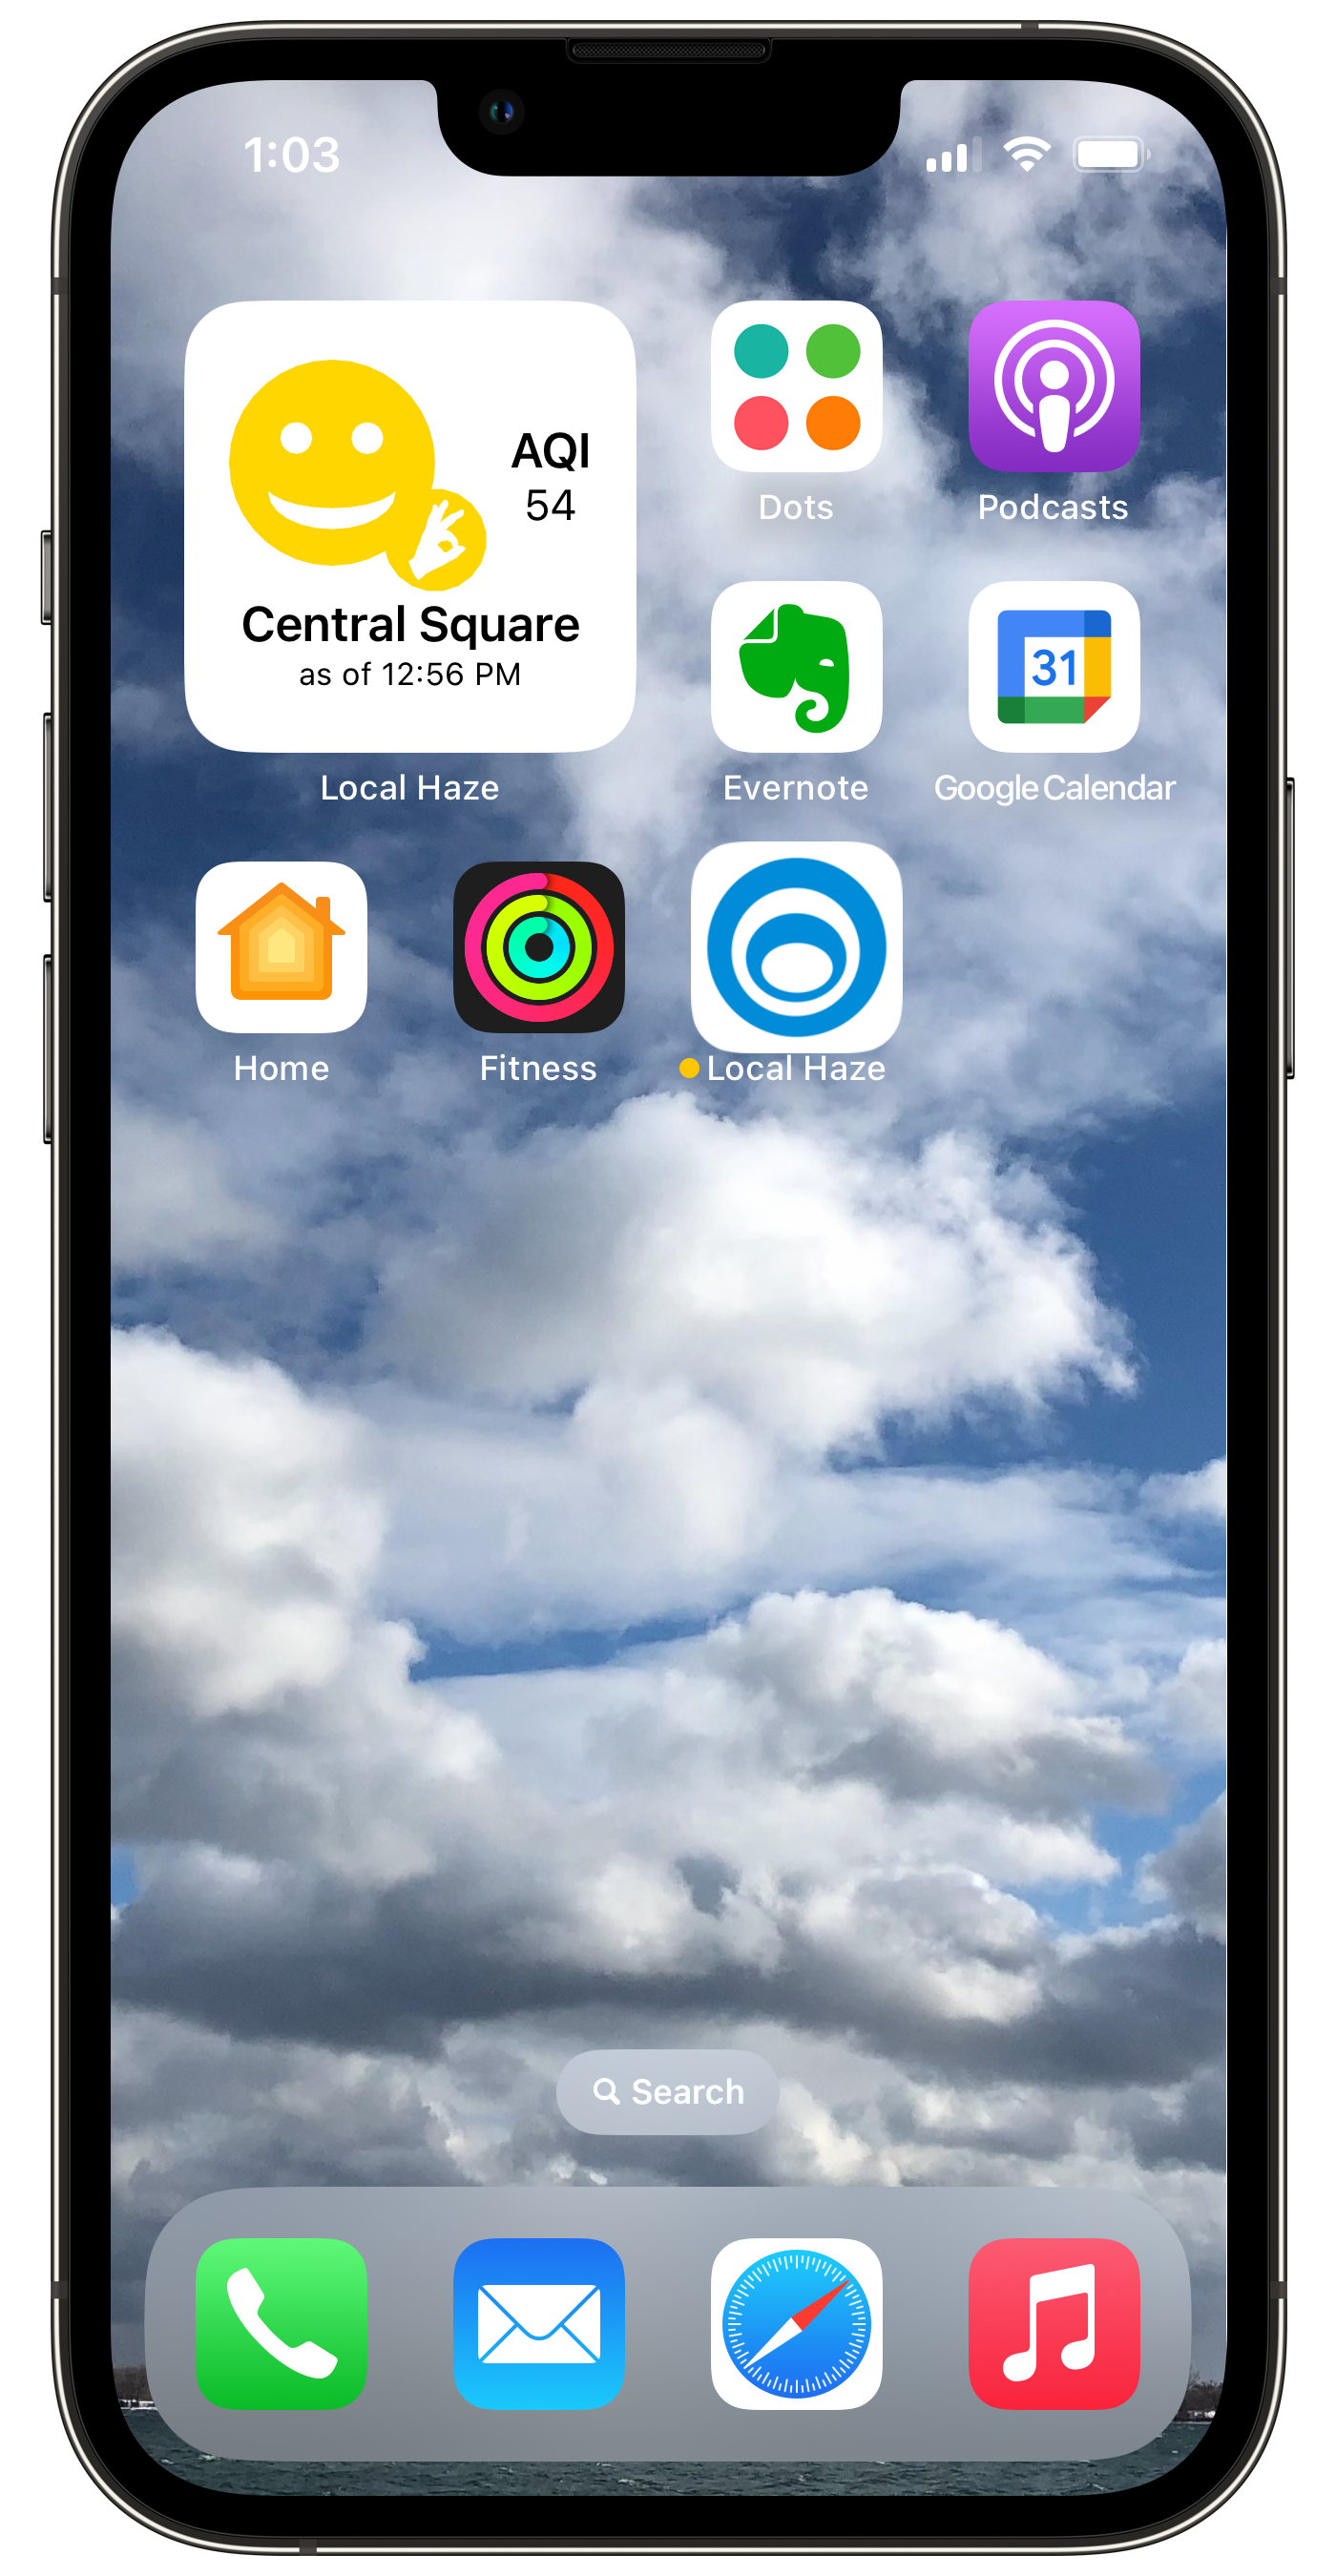
- You can now tap on the widget to launch Local Haze and immediately see the sensor detail screen.
- You can select which Favorite sensor a Local Haze widget displays from the widget’s quick actions menu by doing a long press on the widget and choosing “Edit Widget” from the drop-down menu.

- To add another Local Haze widget, launch the Local Haze app. Search for another sensor and favorite it. Then return to step 4 above and proceed through the steps.
The Local Haze app can be downloaded for free on the Apple App Store.